DIY: Knockoff Anthropologie Mirror (Just $4!)
We decided to do a dollar store craft and chose to knockoff a mirror we saw at Anthropologie. Danielle really loved the mirror and we could get the supplies super cheap – so it was a go!

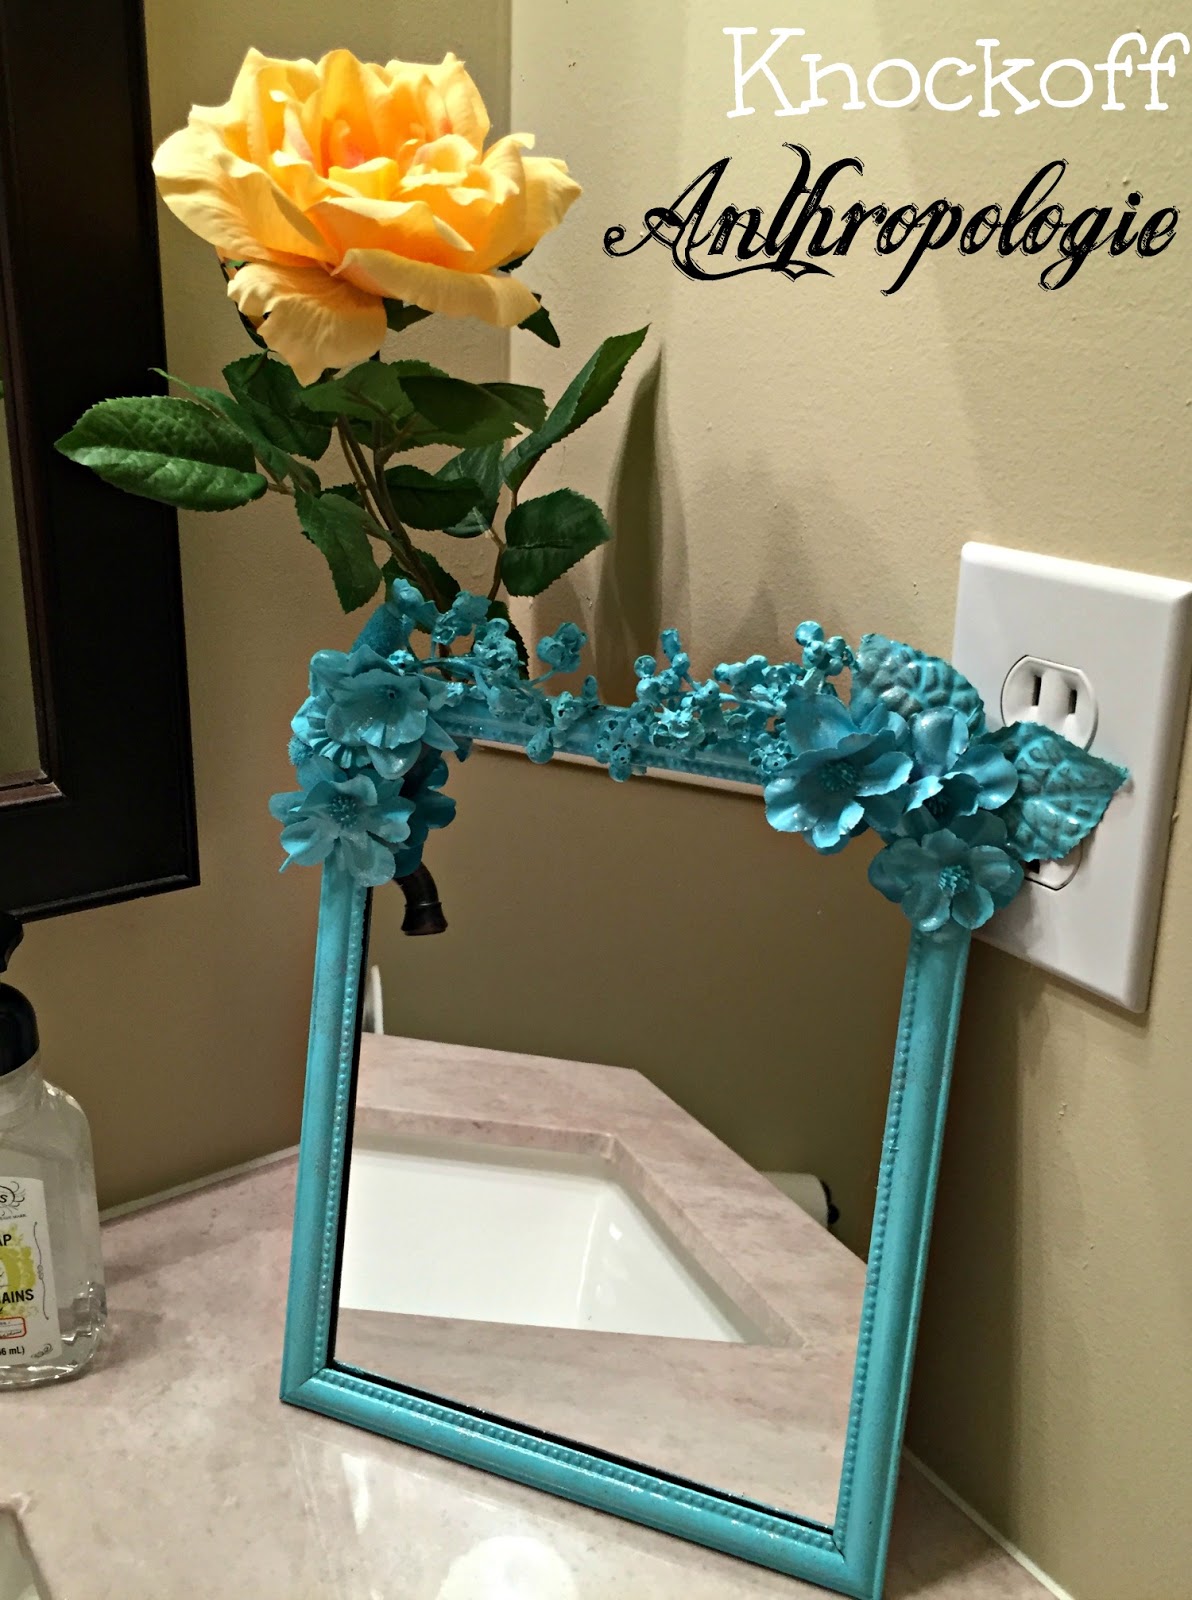
Here’s the original mirror for $49.95 on Anthropologie’s website and our finished project! Ours was around $4! I’ll take that any day!
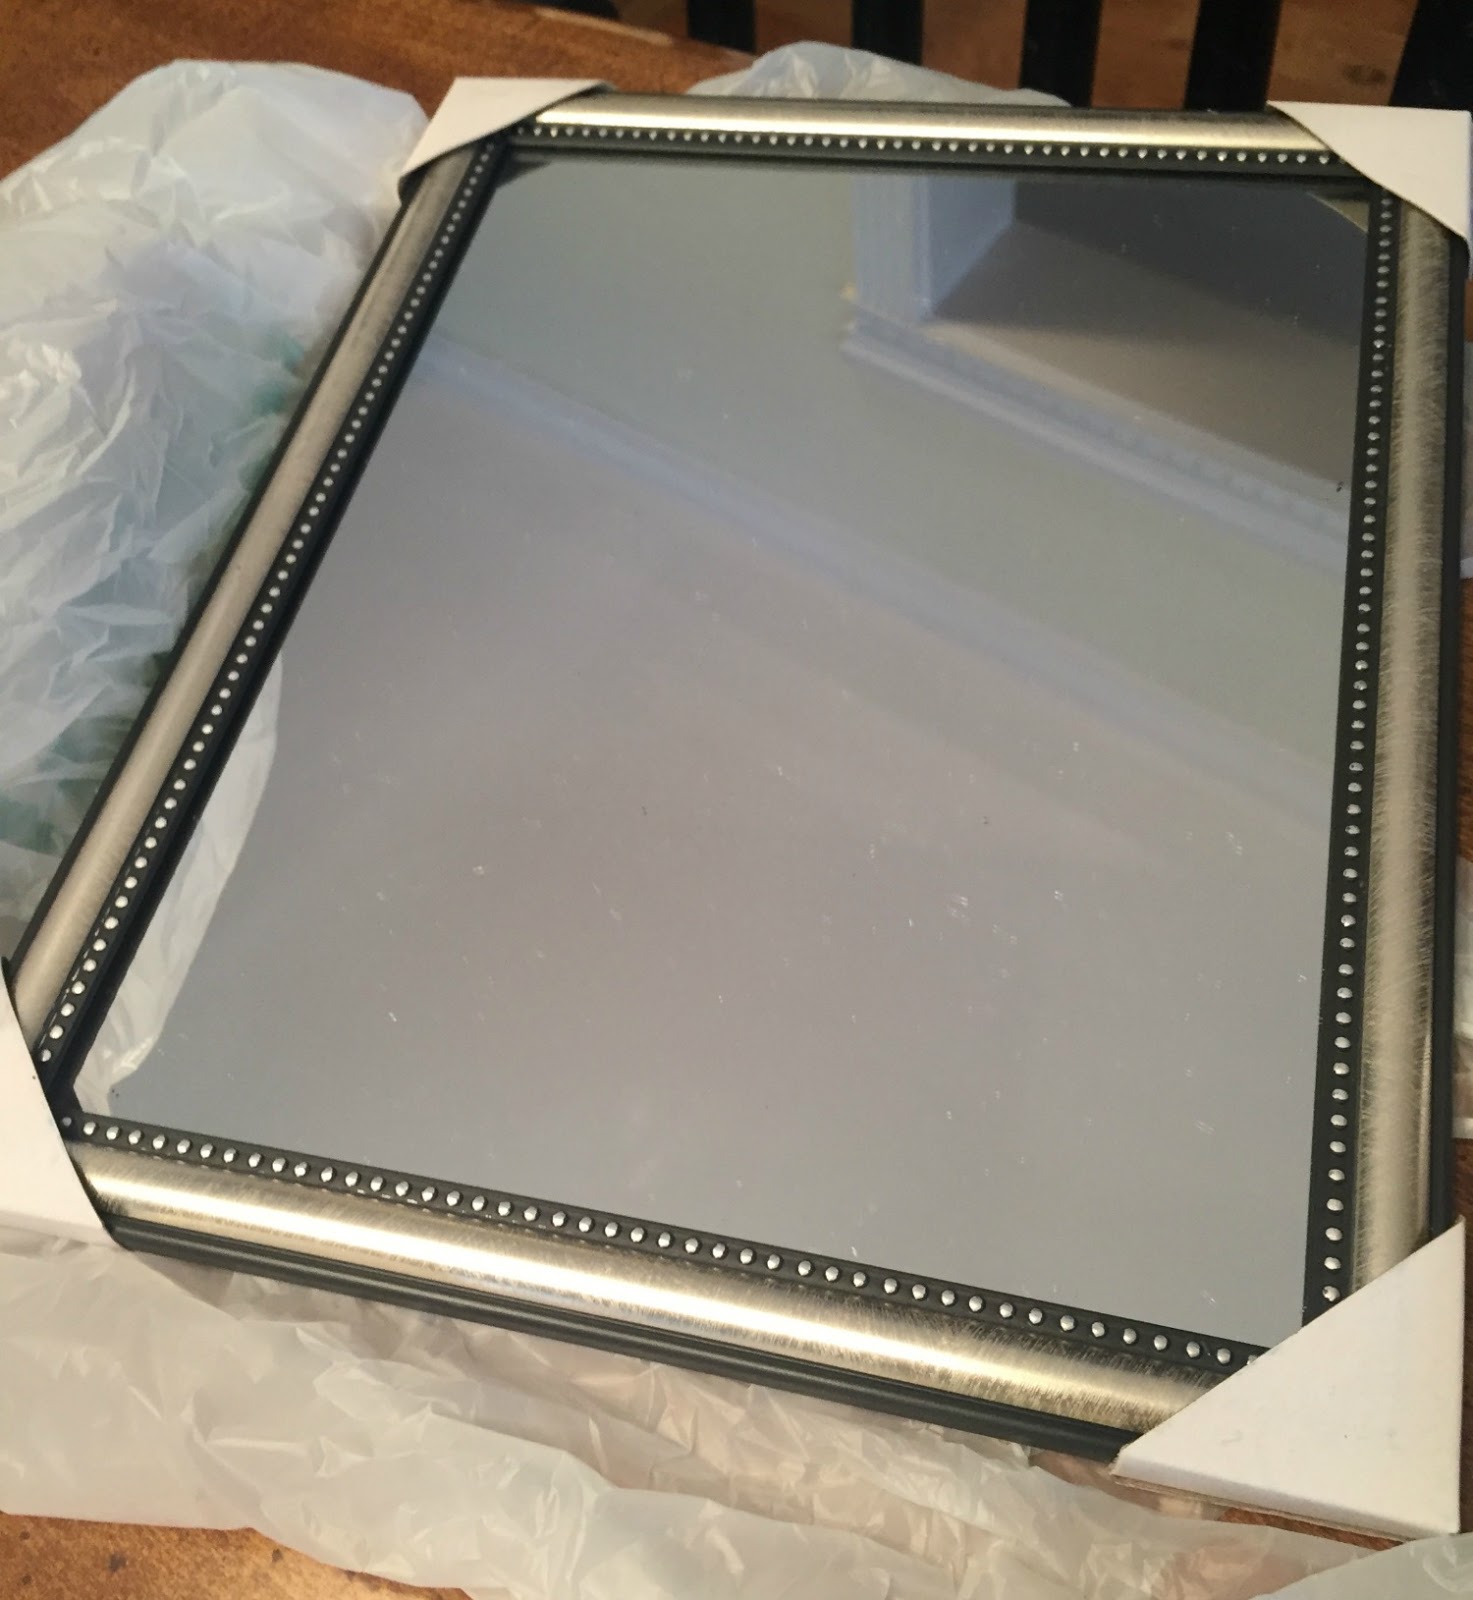
Step 1: First we started with a mirror. Dollar Tree is the key – they are the Dollar Store where everything is actually $1. These were the only small-ish mirrors they had and $1 each was good for me.

Step 2: Tape off the mirror. We just used painters tape and paper but this step is very key!! I tucked the paper under the frame as much as possible and taped it down as tightly as possible. Danielle tried to do this quickly and hers didn’t stay down when we painted – so it’s really important that you get this taped off well.

Step 3: Pick Your Flowers! I got a variety from Dollar Tree – each bunch was $1 and there were a lot of flowers on each “strand” so I spent about $2 per person on flowers. These plastic ones were great – you can just pluck them off the plastic stems and then hot glue them to the mirror.

Step 4: Spray Paint! I got a couple of fun colors (glitter & Tiffany blue) and the other girls had some. This I could not get at the Dollar Store but I got them at Meijer for as little as 99 cents/can.

We all chose different flowers and patterns for our mirrors. The balls were very popular. It was nice that the leaves had texture – it would lend itself well to the paint.

We were not shy with the glue – load it up to get the flowers to stick to each other and the mirror. We had a couple of glue guns going for the three of us.

More glue – these little pink stick flowers were unique and we all liked them but had a hard time figuring out how to use them. I stuck mine on a corner and liked it.

Here’s my finished project – I had them only on the top in case I wanted to set this on a counter rather than hang it.
Once we all had our flowers on the mirrors and the glue was dry – we took them outside and it was painting time!

I brought a box I had leftover from moving and we went in Dani’s garage (it was COLD outside!!). You’re supposed to be above 50 degrees but we did it anyway. Dani brought out a space heater for us to heat up with.
A few tricks to the painting – you’re going to need to hold it up to get in between the flowers. You might plan in advance for a hook on the back mirror hanger or at least something to prop it up with. Also – wear rubber gloves. Rachel didn’t and got some spray paint on her wedding ring! Eek! (Olive Oil & Sugar removed it!)

We also noticed that the paint ate away the little balls that we chose. So some of them are only half there. Not a huge deal depending on how OCD you are. I was fine with it but did go over it a couple more times to make sure I got paint in all the crevices between the flowers.

Here’s a quick selfie of us in the garage – oh how cold it was! We kept huddling around the space heater and holding it on the mirrors and then on us.

Our first couple of coats were in the Tiffany blue color. I wanted a little something more (of course!). The glitter spray paint can was defective but I was able to shake a few sprays out of it over top of the blue. This added a little something fun I think!
After they were painted – we had to let them dry overnight so the paint wasn’t tacky.

The next day I peeled off the paint and paper and took my first pic in the mirror. This is what my friends and I have dubbed #hussyface. I do it all the time! Maybe if I become famous – it’ll become a real thing. 🙂

Here’s a close up on the flowers – I think they look pretty good! We have this in our 2nd bathroom. It’s always good to have extra mirrors around the house.

All in all it was a really fun DIY craft! We all had a great time and the projects turned out great! All in all it was about $4/mirror vs. $49! Not bad at all!