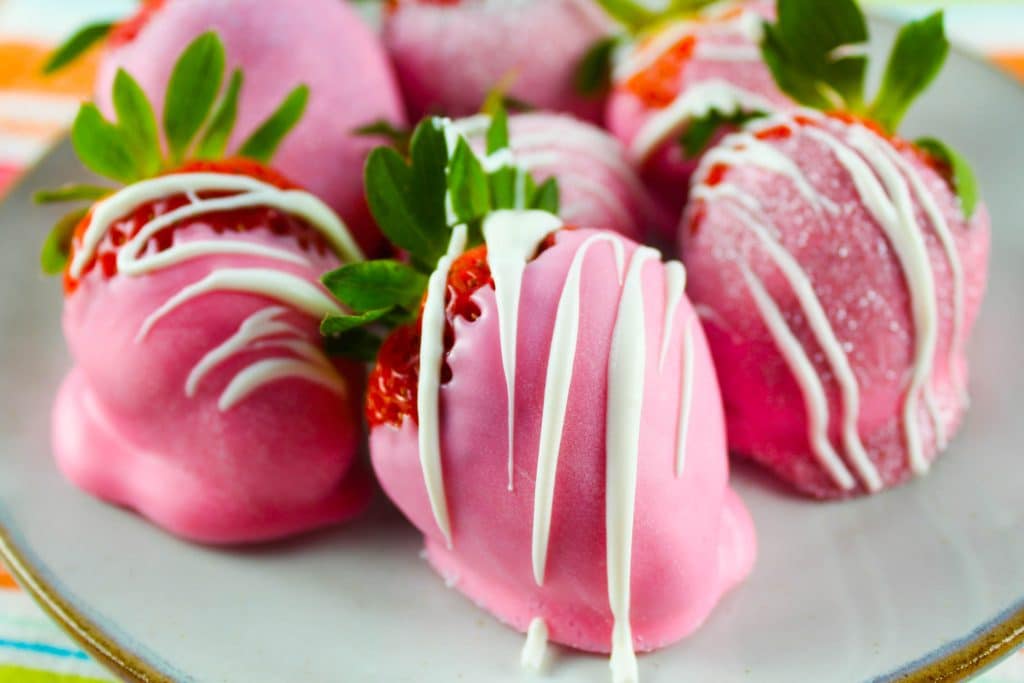
How to Make Pink Chocolate Covered Strawberries
Pink Chocolate Covered Strawberries are such a fun little treat – and you don’t have to just save them for Valentine’s Day! Heck – they are great for any day of the year but also for other fun holidays like Easter and Mother’s Day or even birthdays and baby showers!
Want to save this recipe for later?
I’m no expert cake decorator or candy maker – and I was able to do these pink strawberries and think they are so pretty! So let me tell you – if I can do it – YOU CAN DO IT!
- Ingredients for Chocolate Covered Strawberries
- 3 Ways to Melt Chocolate
- Easy Tips for Dipping Strawberries in Chocolate
- Tips for Decorating Chocolate Covered Strawberries
- How to Store Chocolate Covered Strawberries
- FAQs
- How to make a Themed Dessert Box
- More Strawberry Desserts
- How to Make Pink Chocolate Covered Strawberries
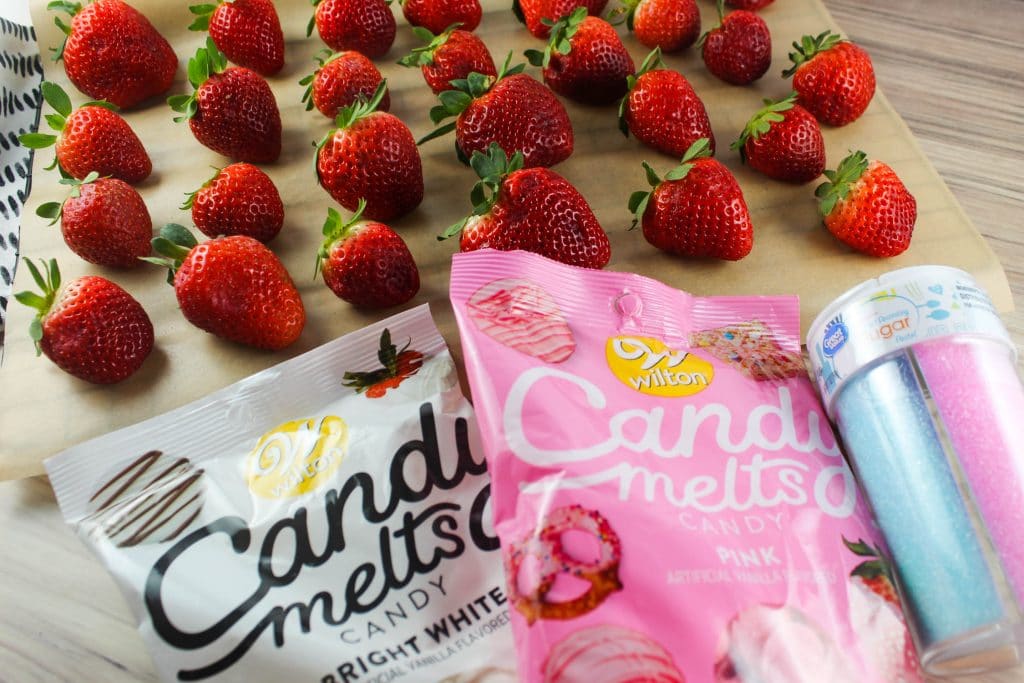
Ingredients for Chocolate Covered Strawberries
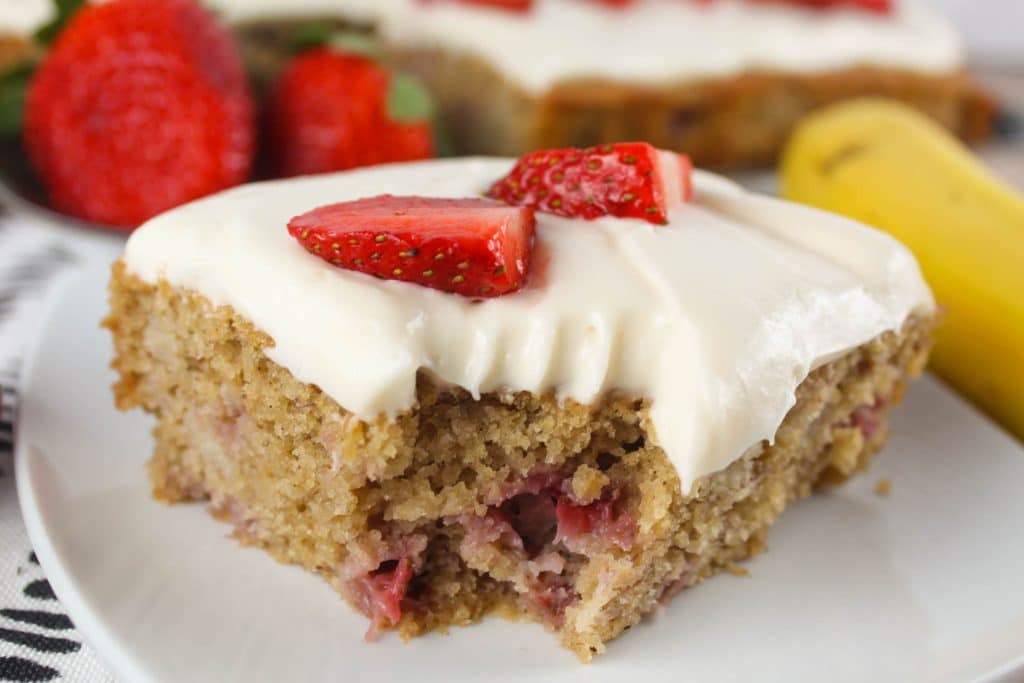
Our local FFA sells strawberries every spring and I got 3 containers of them – one container went to my Strawberry Banana Cake – and the rest were ready for dippin in chocolate!
You just need a few ingredients to make these pink chocolate covered strawberries –
- Big strawberries with tops – I recommend picking these strawberries yourself at the store (or a strawberry patch!) vs letting Instacart do the work. I was so lucky that our FFA strawberries were all perfection!
- Be sure the leaves are on the berries – the stems are a perfect handle for dipping into the chocolate!
- Candy melts – I went the super simple route on this and bought pink and white candy melts – SO MUCH EASIER!!!!
- You can also use milk chocolate or white chocolate – chunk or chips. If your chocolate is too thick – add a tiny bit of butter, coconut oil or shortening to thin the chocolate out a bit.
- If you want to make your own pink chocolate – add red or pink food coloring to melted white chocolate. Go easy on the food coloring – you can always add more to get the pink shade you like!
- Decorations & Toppings – more on this below!
3 Ways to Melt Chocolate
There are multiple ways to melt your chocolate – I went the easy route – but here are your options:
- Mini crock pot – I have one of these I always use for my famous queso! I used the mini-crock for the pink chocolate melts since that was my main color. Here are a couple of tips to using the mini-crock pot:
- Use a crock pot liner – yes – they’re much bigger than your little mini – but cleanup is so worth it!!!
- Melt on a low temp – I MIGHT have turned it on high and burned it. I just spooned out the burned, scorched corners of the chocolate and used the rest – it was fine! But I quickly turned that temp to warm!
- Microwave – because I was using the white candy melts for decoration – I needed a lot less. Put white chocolate candy melts in a small microwave-safe bowl. Melt them in 30-second intervals – stir – melt – stir.
- You could also use 1/2 cup of white chocolate chips for the drizzle.
- Double boiler – if you’re old school – or doing a big batch – try a double boiler! You’ll have the bottom pot with simmering water and a bowl on top – not touching the water – to melt the chocolate. This is how my Grandma always did it.
Easy Tips for Dipping Strawberries in Chocolate
Take it from me – there are things you can do to make this process easier! Here are my easy tips to success!
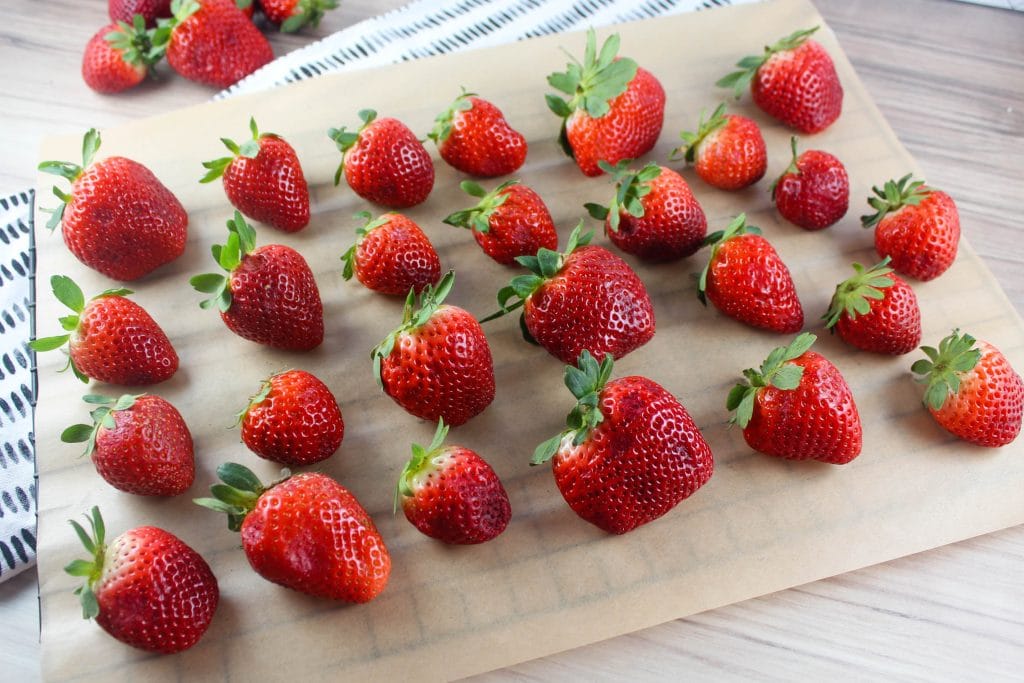
- Room temperature – Be sure your strawberries are at room temperature before you dip them. I keep strawberries in the fridge so they stay fresh longer. I took the berries out – rinsed them – and set them on the counter for two hours. This allowed them to get to room temp and helps the chocolate stick.
- Rinse & DRY – If you wash at room temp – be sure to pat dry with a paper towel. You need them to be dry before you dip as well so the chocolate will stick.
- Candy melts – I like things to be easy – so I bought candy melts! They melt perfectly!
- If you’re having a hard time finding the pretty colors in your grocery store – find the cake decorating section at a larger store like Walmart or Meijer! They had EVERY color there! You can usually find white/chocolate in the cake aisle of the grocery store.
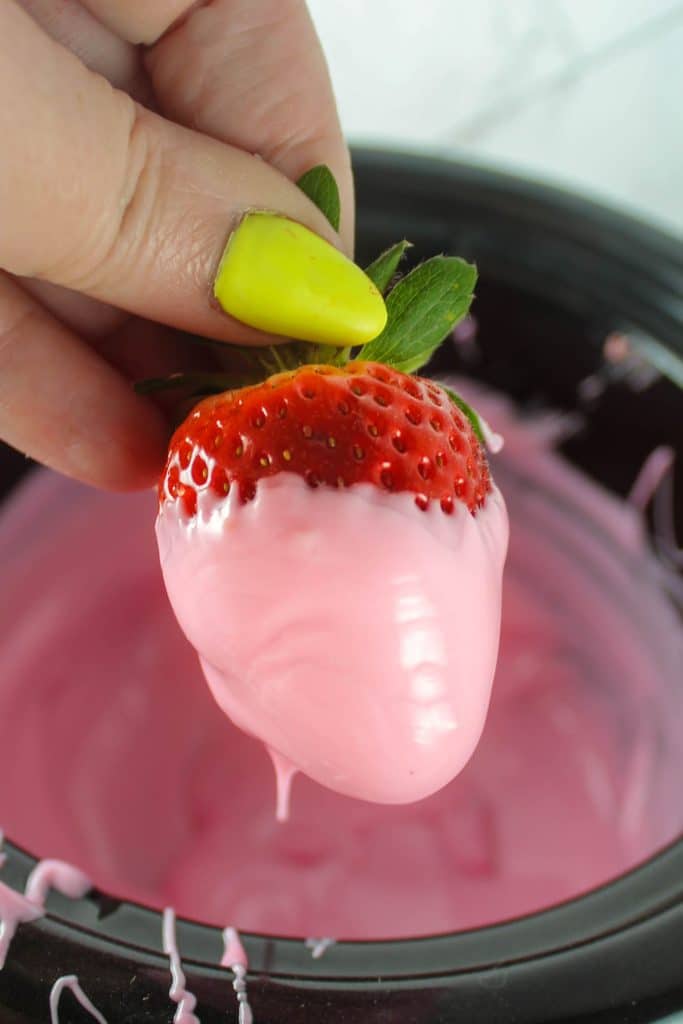
- Shake it off – Once you dip your berries in your melted chocolate, shake them off and let them drip. Don’t be in a hurry to set them down. I got in a bit of a hurry and some of the chocolate pooled up. Frankly – I didn’t mind – just more chocolate to eat!
- Parchment paper & baking rack – Set up your station with parchment paper on the counter and a baking rack on top. This will allow any excess chocolate to drip off rather than pool up and make clean up quick and easy!!!
- You can also use wax paper instead of parchment paper – I bought a big pack of parchment sheets and it’s been a fantastic purchase! They’re so handy!
- If your berries want to wobble like weebles – you can set directly on a parchment lined baking sheet – but you might have the chocolate pool up a bit.
- Sprinkle when wet – If you’re using sprinkles, sugar, etc. to decorate your berries, be sure your main dip is still warm and wet. This will give the coatings something to stick to. You’ll want to dip and decorate a few berries at a time.
- If you’re using a second color (like I did with the white) – you can let the first dip dry – and then go over the top with the 2nd color.
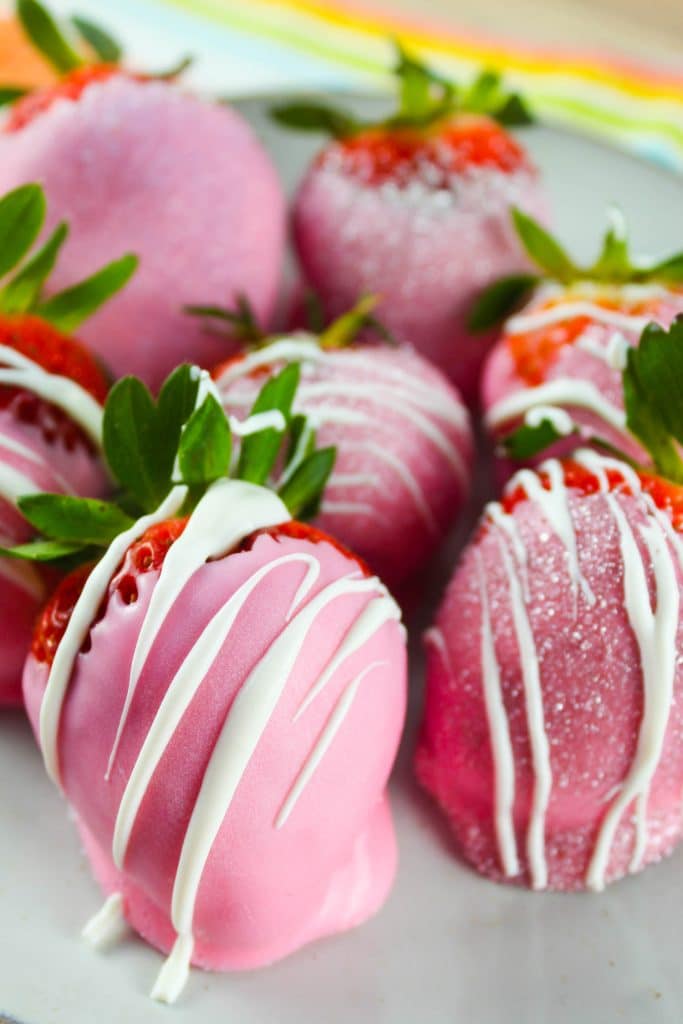
Tips for Decorating Chocolate Covered Strawberries
Decorating your berries can be a fun, family activity! But if you’re making these for a party or really want them to be pretty and perfect – here’s a few tips to making pretty with zero prior experience!
- Topping ideas – there are lots of topping ideas you can use for these – I went simple with chocolate and glitter but here are a few ideas:
- chocolate drizzle – buy a contrasting color of the candy melts for a drizzle
- fine glitter sugar – there are so many pretty edible glitter sugar sprinkles – I found this beautiful rose gold color that looked really nice on the berries
- chunk sugar – this is what I planned on using but couldn’t find – but there are tons of them online
- chocolate shavings – you could also use a chocolate bar of a contrasting color and grate shavings over the berries
- crushed nuts or pretzels – finely dice pretzels and nuts for a fun crunch
- sprinkles – sprinkles are always a great idea and there are so many fun colors
- Sprinkle when wet – as mentioned above – when you’re using sprinkles, glitter sugar, nuts – you’ll want to add that while the main dip color is still wet so the topping adheres. These berries dry quickly – so just do a 3-5 berries at a time.
- Drizzle when dry – if your’e doing a chocolate drizzle – you can let the first coat of chocolate dry
- Use candy melts – I used white candy melts for a white chocolate drizzle – but you could also do white for the base and a bright pink chocolate drizzle – or both!
- Here’s how to do it successfully:
- Use a small fork or a small spoon with just a little bit of the HOT melted chocolate (1/4-1/2 tsp)
- Hold the chocolate a few inches above the berries
- Sway the spoon above the berry – always going in one direction – this will give you the nice lines across the berries.
How to Store Chocolate Covered Strawberries
These pink chocolate strawberries are really great the day of or the next day – if you’re serving that quick – there’s no need to refrigerate.
That said – you definitely can keep them longer! I’ve had mine in the fridge for a week now and they’re still delicious!! Here are my tips for storing them for up to a week:
- Use an airtight container – I have these glass containers that I use for everything – no more plastic that warps and stains!
- Don’t layer your berries – store them in a single layer in their container.
- Lay a paper towel in the bottom of the storage container to absorb any water as the berries will sweat a bit in the refrigerator.
FAQs
If you’re having problems with this – be sure your strawberries are at room temperature and dry before dipping them into the melted chocolate.
Nope! They should be room temperature.
I took my berries out of the fridge 2-3 hours before dipping them so they could warm up.
You do not NEED to. If you’re serving that day or next day – you should be fine. If you want to keep them longer than that, refrigerate so the berries stay fresher longer.
Chocolate covered strawberries will last up to a week in the refrigerator.
If you refrigerate them, they will sweat a bit. I set them on a paper towel in their container to absorb that excess water.

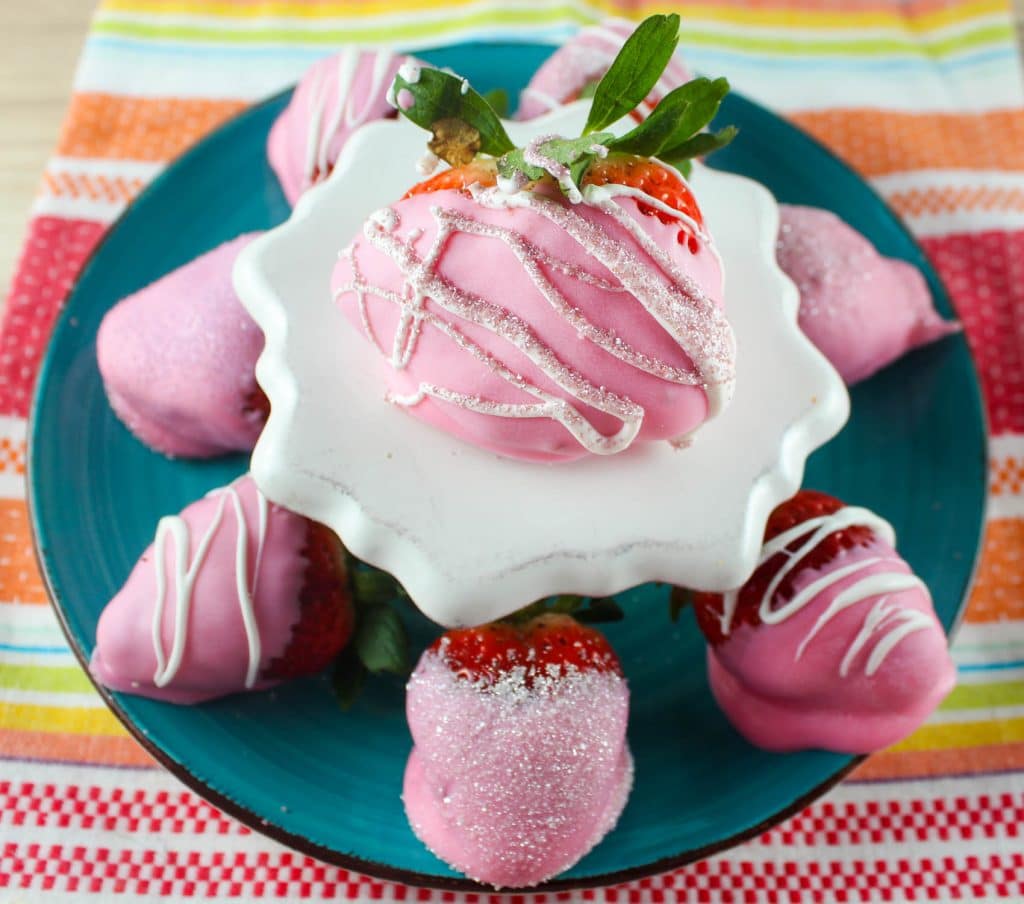
How to make a Themed Dessert Box
You can also take these chocolate covered strawberries and add them with other treats to make a big themed dessert box or tray! The photo above is from Batter Up Bakery, a local bakery in Leesburg, OH, that made some fun Super Bowl boxes with cookies, brownies and other sweet treats! How fun is that!!!!
This post may contain affiliate links. For more information, please see our disclosure policy.

How to Make Pink Chocolate Covered Strawberries
Ingredients
- 24 strawberries
- 12 oz pink chocolate candy melts
- 4 oz white chocolate candy melts
- glitter sugar sprinkles
Instructions
- Prep your strawberries by rinsing them, drying them and leaving them out so they come to room temperature24 strawberries
- Using a mini-crock pot, melt 1 bag of pink candy melts on low12 oz pink chocolate candy melts
- Check crock pot every 5 minutes or so to stir until chocolate is melted (approx 20 min)
- While chocolate is melting, prepare your baking rack or baking sheet with a parchment paper lining
- Unplug crock pot and set up your decoration station!
- Using strawberry stem as a handle – dip strawberry into melted pink chocolate and fully coat all sides of berry – shake excess chocolate off berry
- Lay berry on baking rack or parchment paper to dry
- Repeat with all remaining strawberries
- If using sprinkles, etc. – top berries while chocolate is a bit warm/wetglitter sugar sprinkles
- If using a second color of chocolate for a drizzle – you can wait until berries dry
- Melt white chocolate candy melts in a microwave safe bowl for 30 seconds – stir and add time as needed to melt4 oz white chocolate candy melts
- drizzle melted white chocolate over dipped berries using a small spoon
- Best if served day of or next day – no need to refrigerate
- If keeping longer, store in a single layer in air tight container for up to one week
Those looks super pretty. I am writing really impatiently for berry season to begin in Scotland.
These strawberries are so cute! I love making these for a quick, easy dessert regardless of the occasion!
Such a fun treat for celebrating! My daughter would love making these with me so much, especially with the glitter sugar sprinkles.
This was so easy to make, and they ended up looking so good! Such a yummy way to celebrate the season’s best berries!
I love that you included the detail about picking your own strawberries versus using Instacart—it really does make a difference when you can choose the ones with the stems still on for dipping.